Add/Edit A Menu
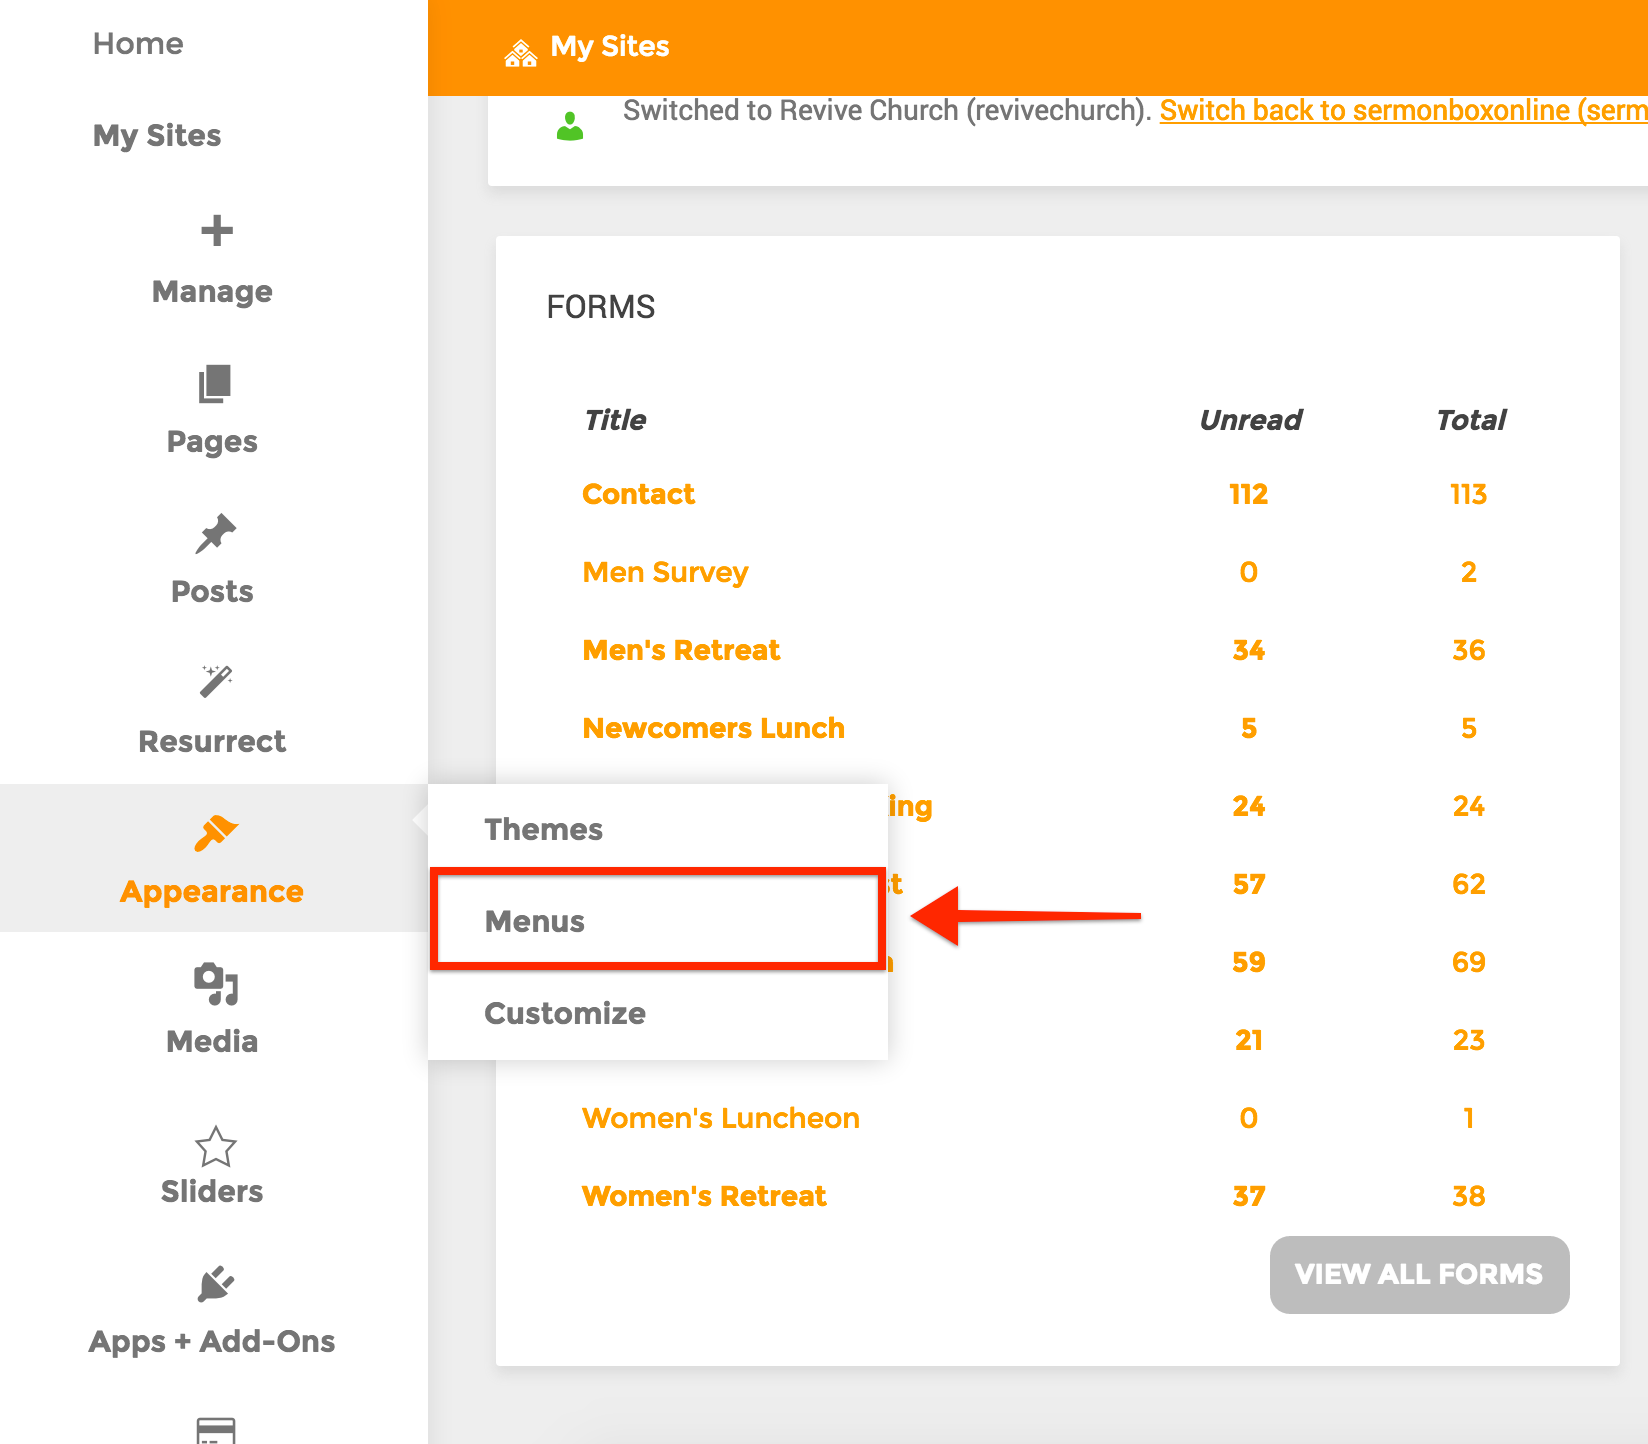
2) Locate the Appearance menu item in the left-hand menu bar
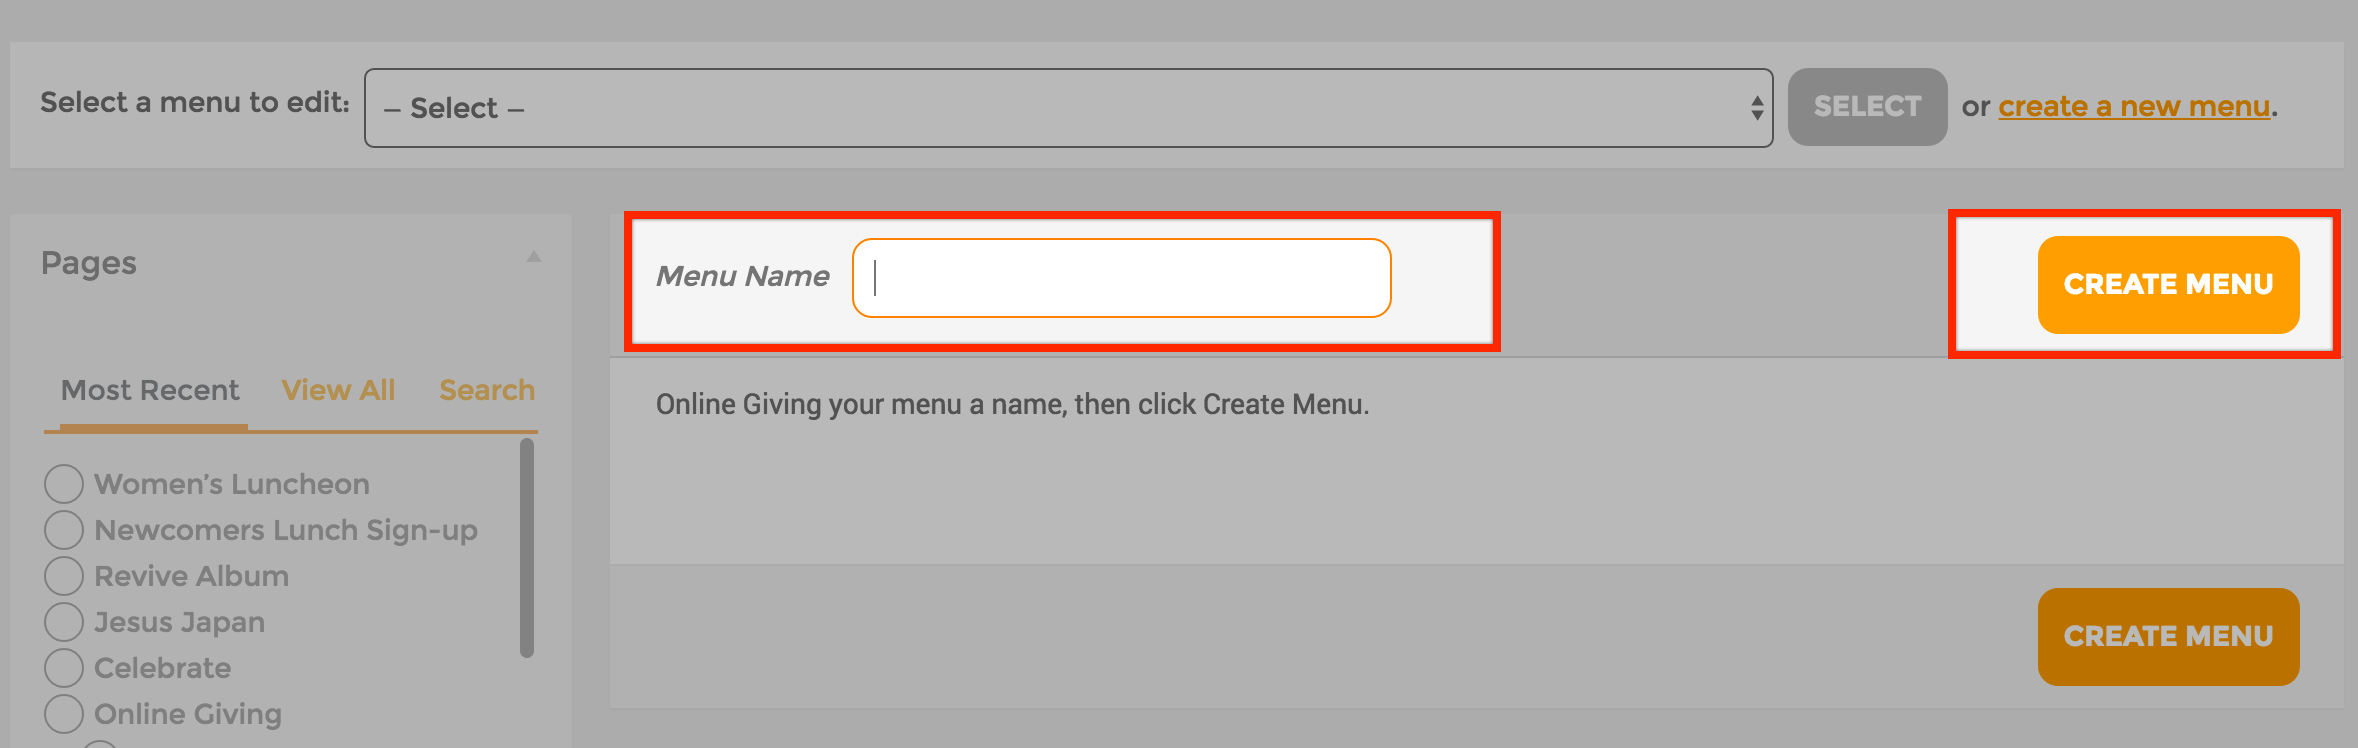
CREATE A NEW MENU
1) Select 'Create A New Menu' on the right-hand side
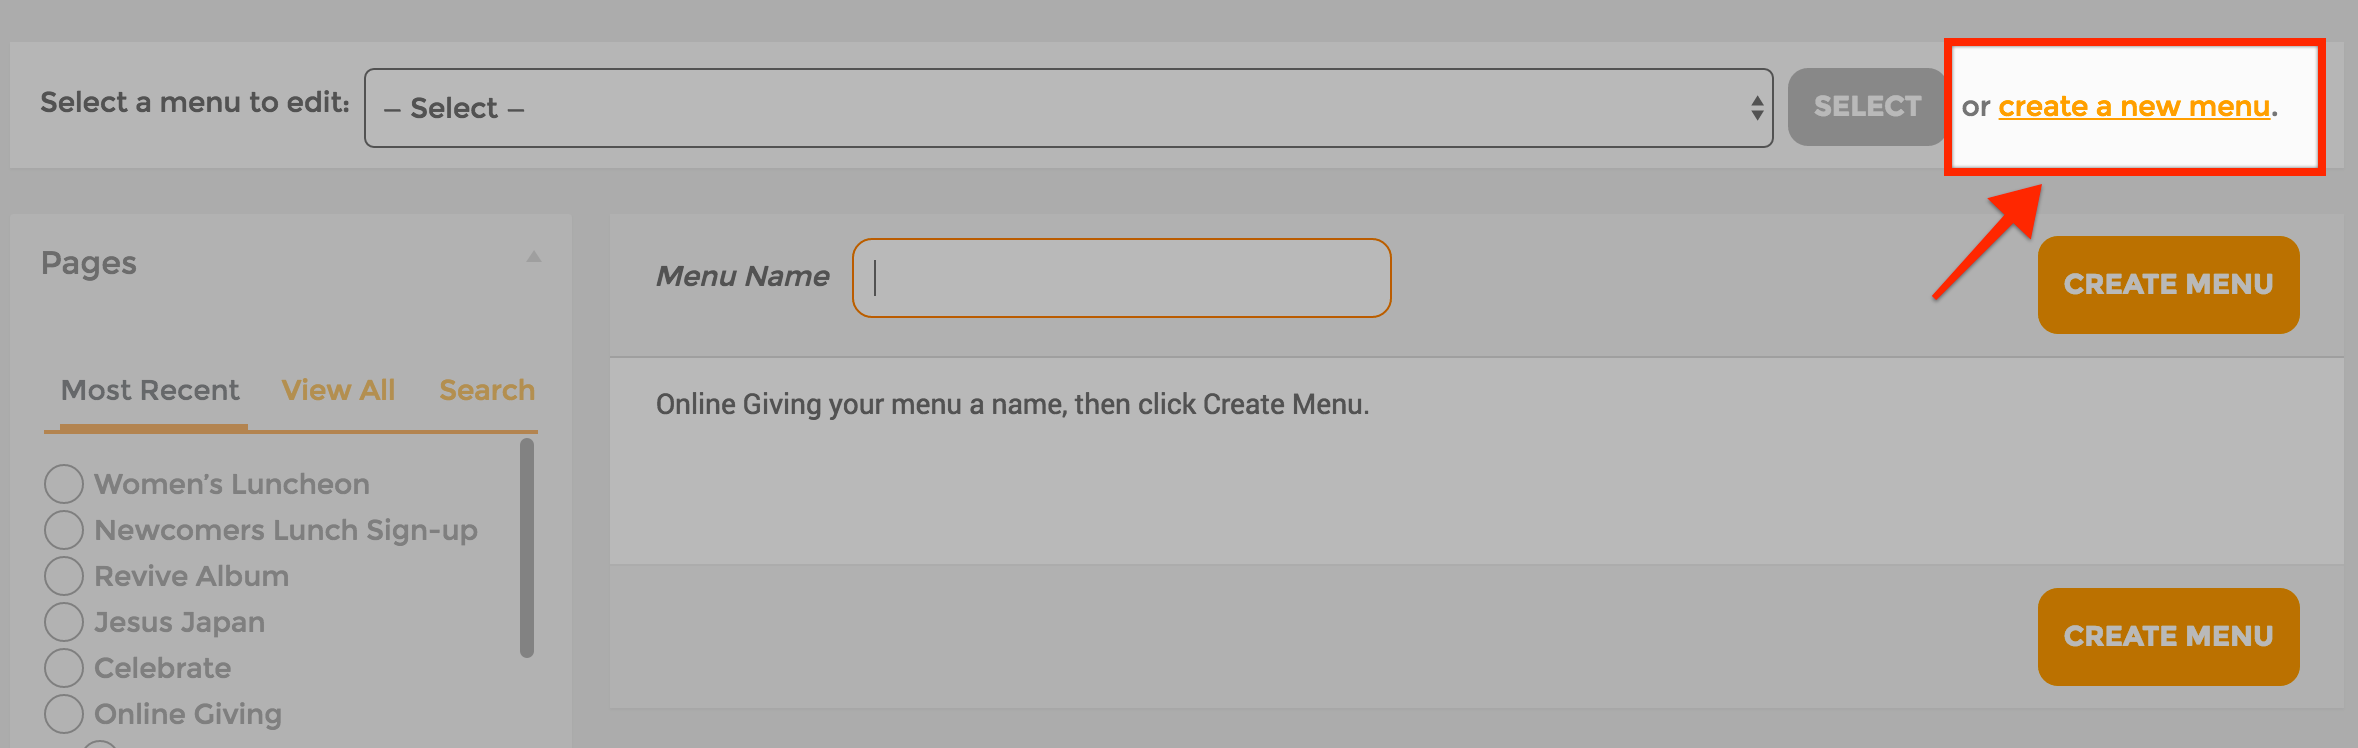
2) Give the new menu a name then, select 'Create Menu'
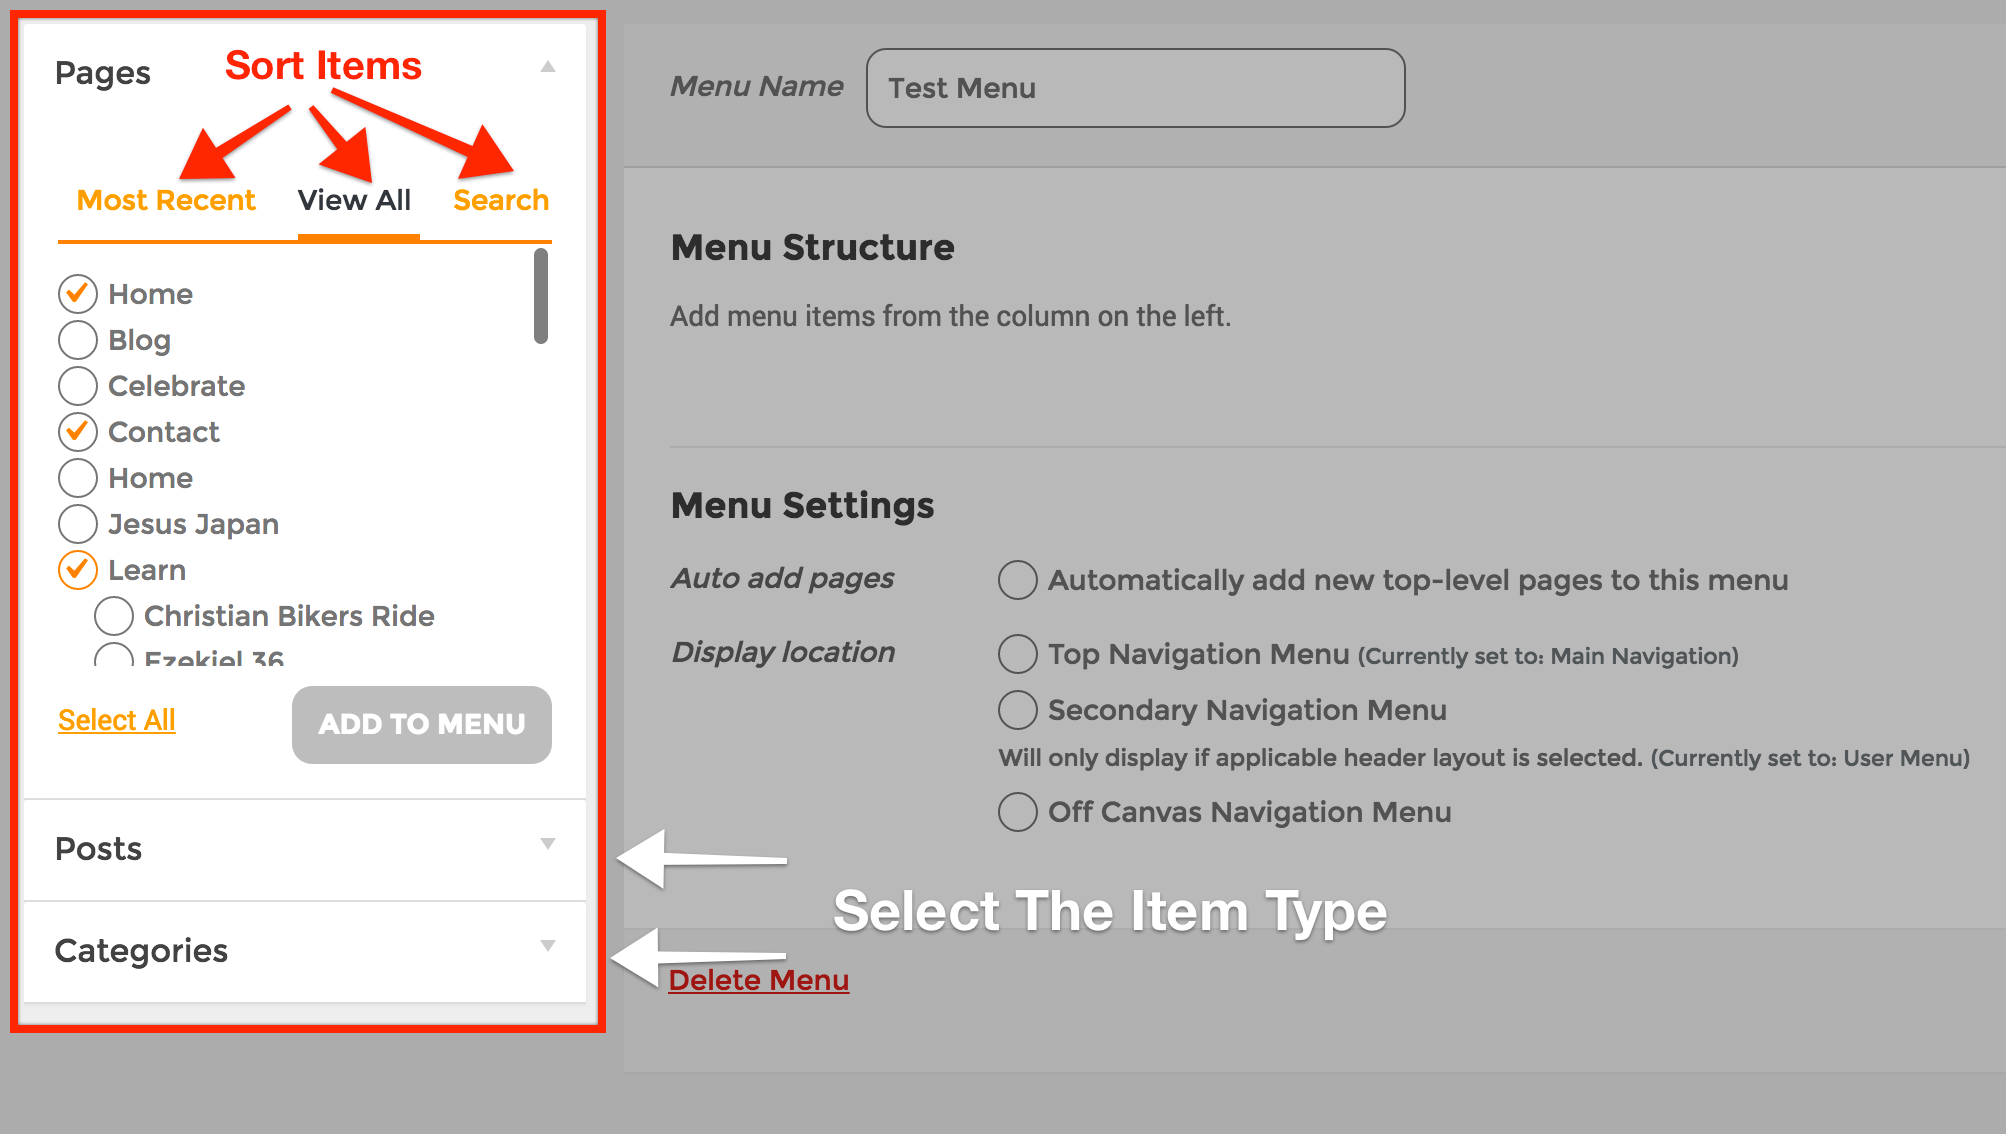
ADD NEW MENU ITEMS
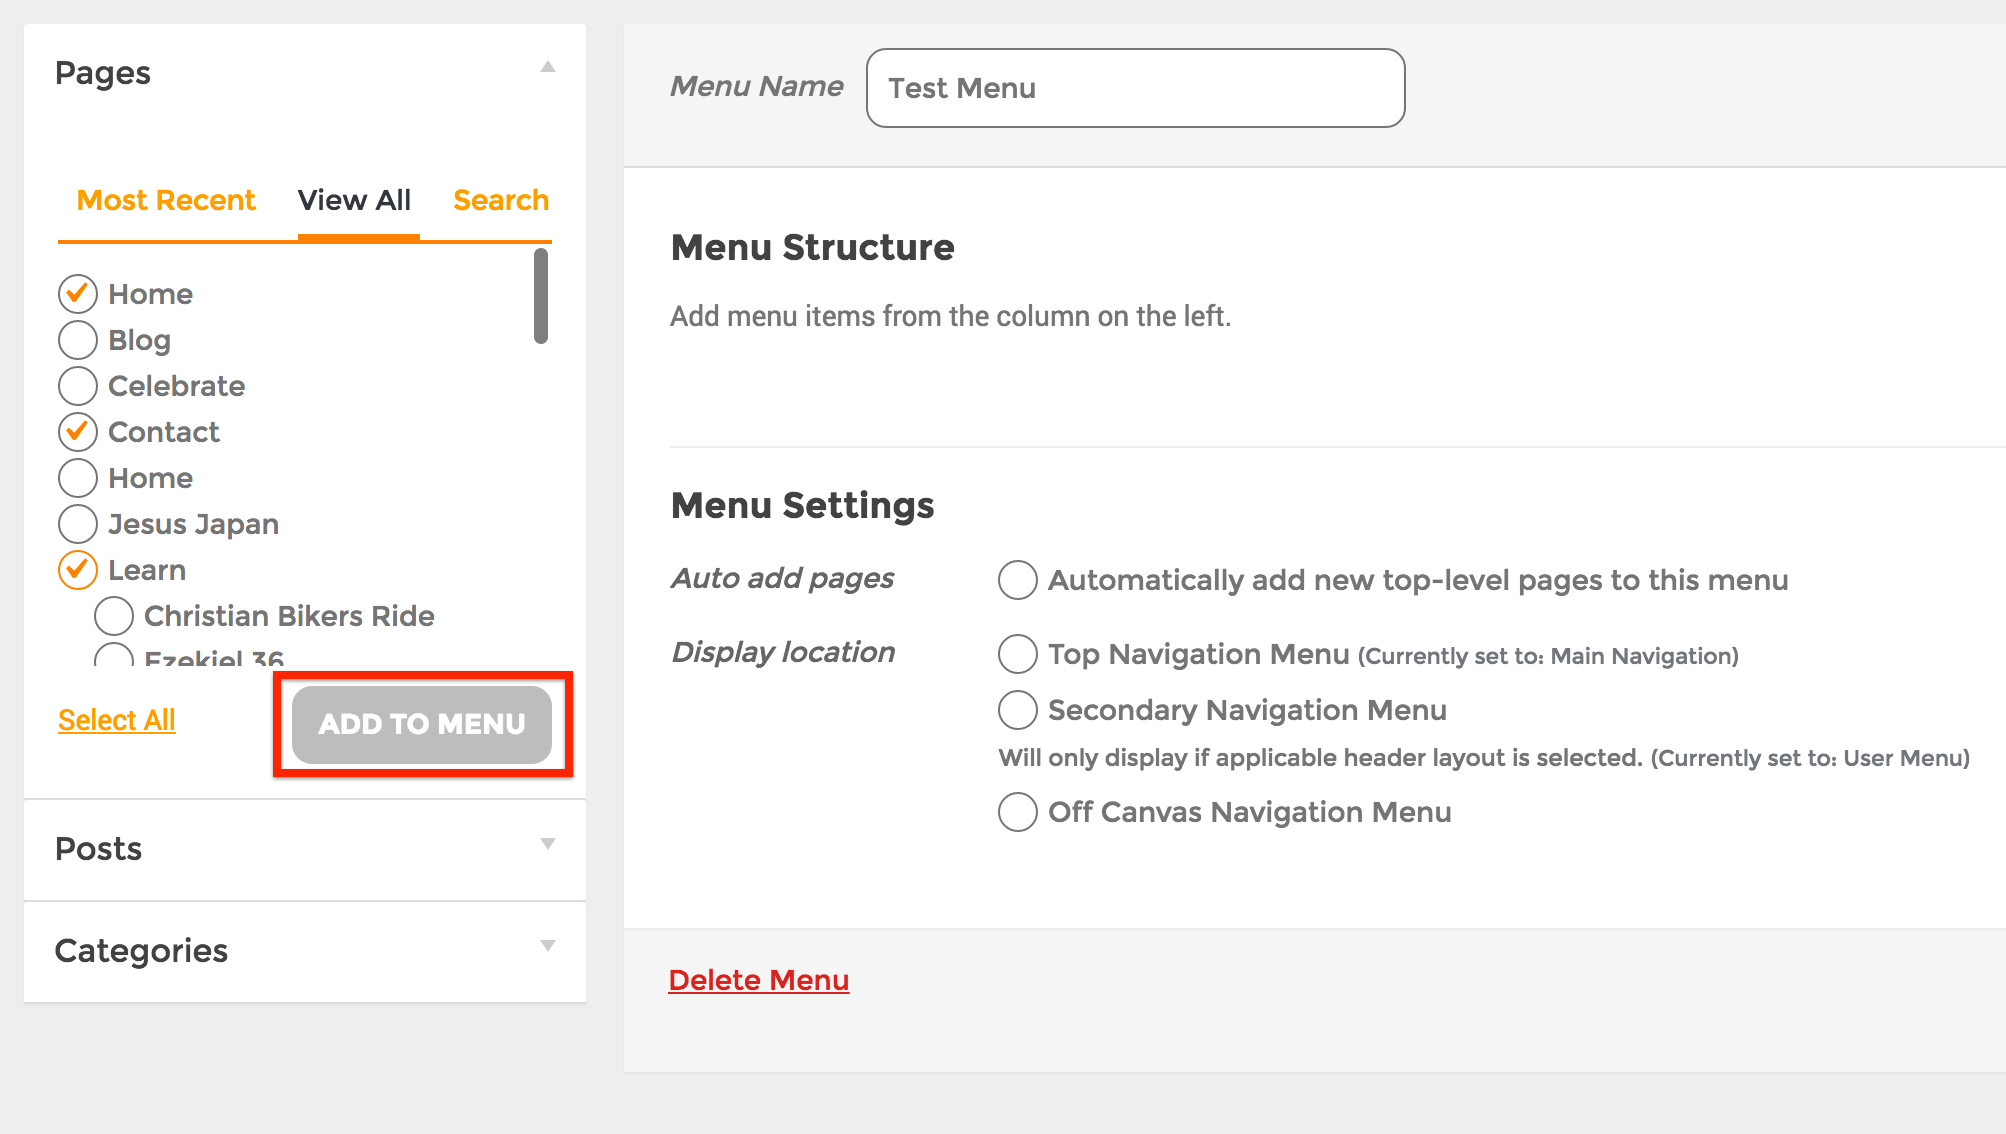
1) Add items to the menu by checking your desired items in the box to the left
There are 3 types of menu items you can choose from:
- Pages - Pages you created in the pages section
- Posts - Blog posts you've added in the blog section
- Categories - Blog post categories you've added under blog > categories
Under each type of menu item, you can choose to view the Most Recent, View All, or Search.
Select 'Add to Menu' once you've selected your desired items.
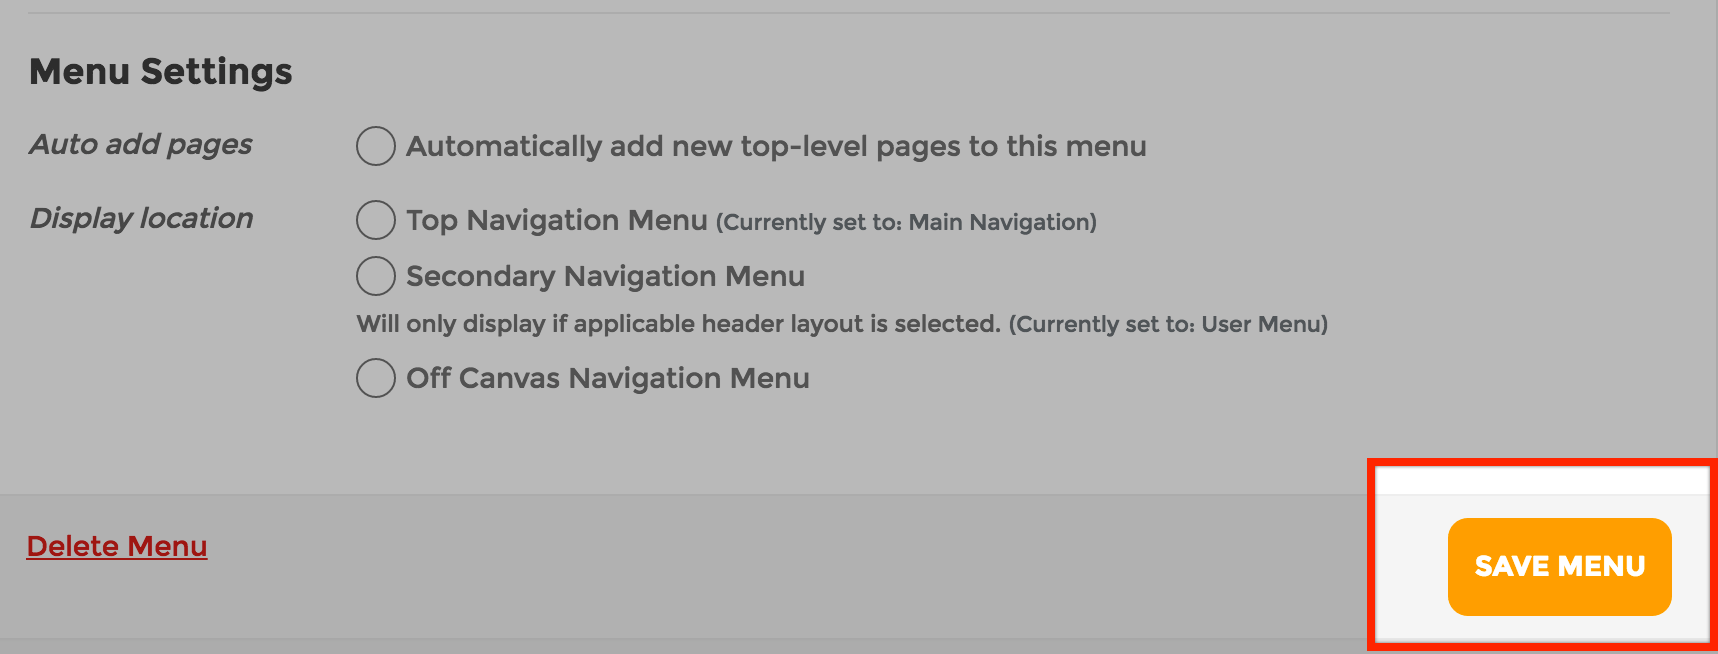
2) Save your changes by clicking SAVE MENU
EDIT MENU OPTIONS
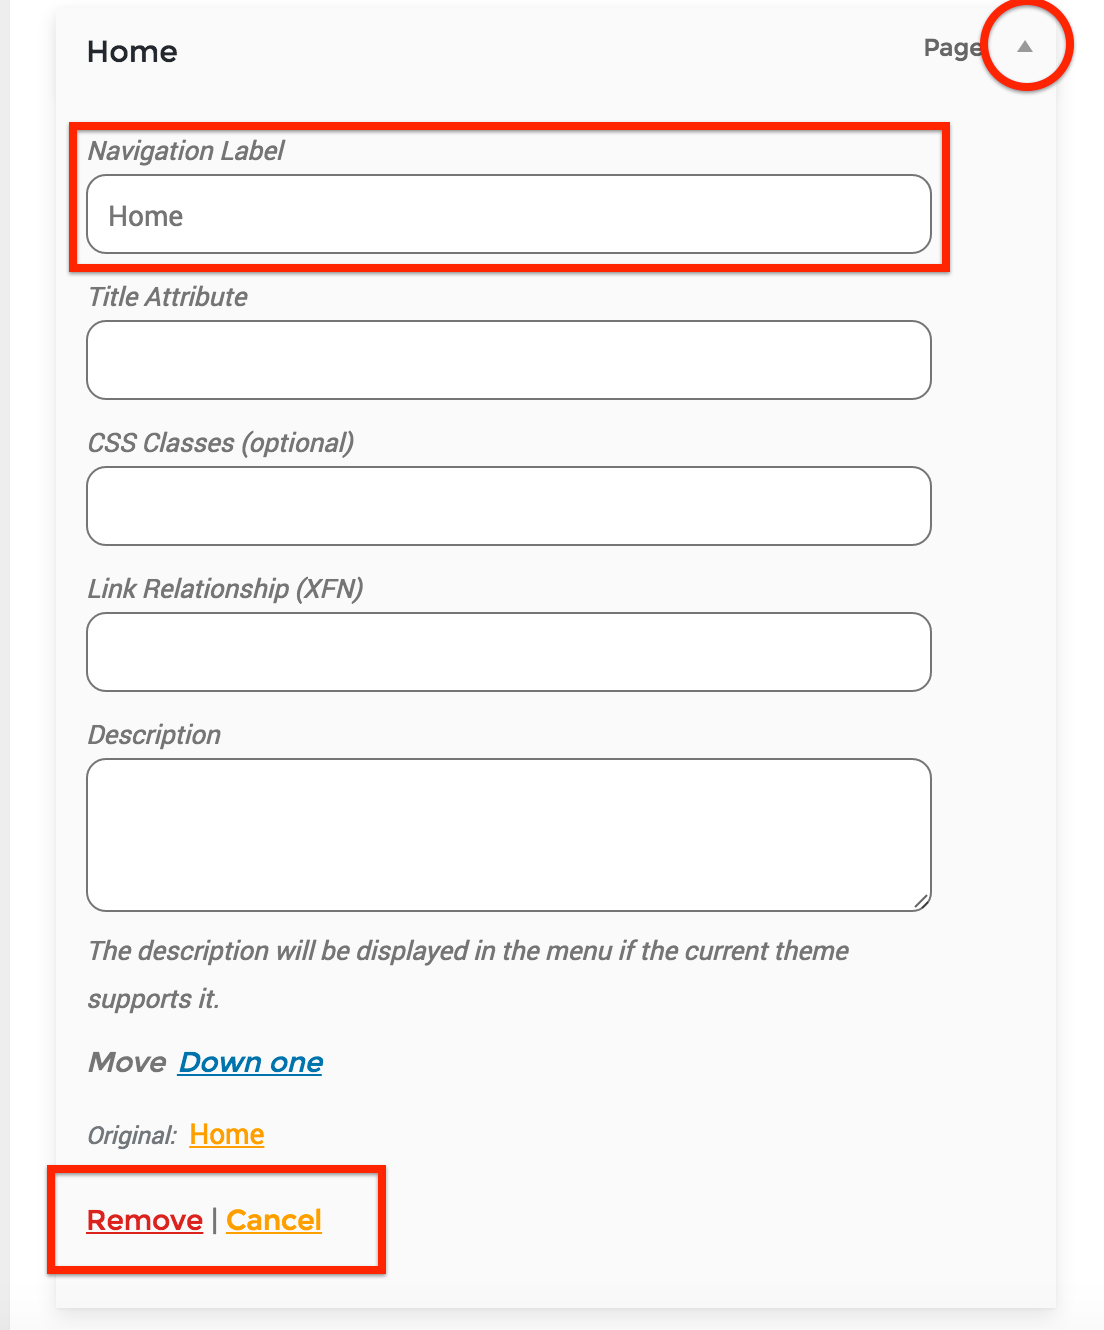
1) To edit individual menu items, click the drop-down arrow at the right of the item.
- Navigation Label - Changes the title for the item link. Default label is the page or post title.
- Title Attribute - Text that is displayed when hovered with the cursor. (Optional)
- CSS Classes - CSS class for custom styling. (Optional)
- Description - Some themes or menu locations will display the link description. (Optional)
- Move - Moves the selected item up or down one position (or use drag + drop)
- Original - The page/post that is associated with the link
- Remove/Cancel - Deletes the link / Cancels any changes made
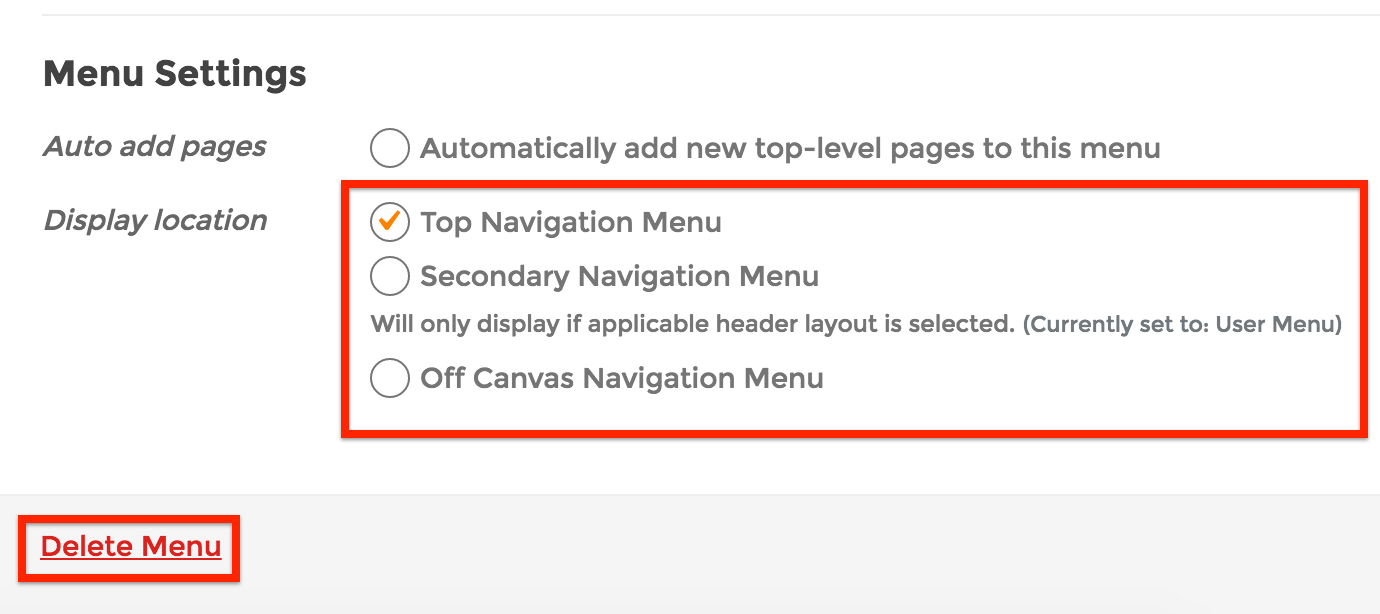
2) To edit the entire menu's settings, navigate to the options at the bottom labeled 'Menu Settings'
- Auto add pages - The option will automatically add any new top-level pages to this menu. Meaning any page without a parent page will be added.
- Display location - Where should the selected menu be displayed?
- Top Navigation - Main Site Navigation or the site's header bar
- Secondary Navigation - The site's secondary navigation. This is enabled/disabled in the theme options. Usually above or below the main navigation
- Off-Canvas Navigation - The site's slide out menu. This is enabled/disabled in the theme options and can be accessed by clicking the hamburger icon in the site's header bar
- Top Navigation - Main Site Navigation or the site's header bar
3) Drag and Drop to reposition menu items

MANAGE MENU LOCATIONS
1) Select the 'Manage Location' button in the top bar in the admin area
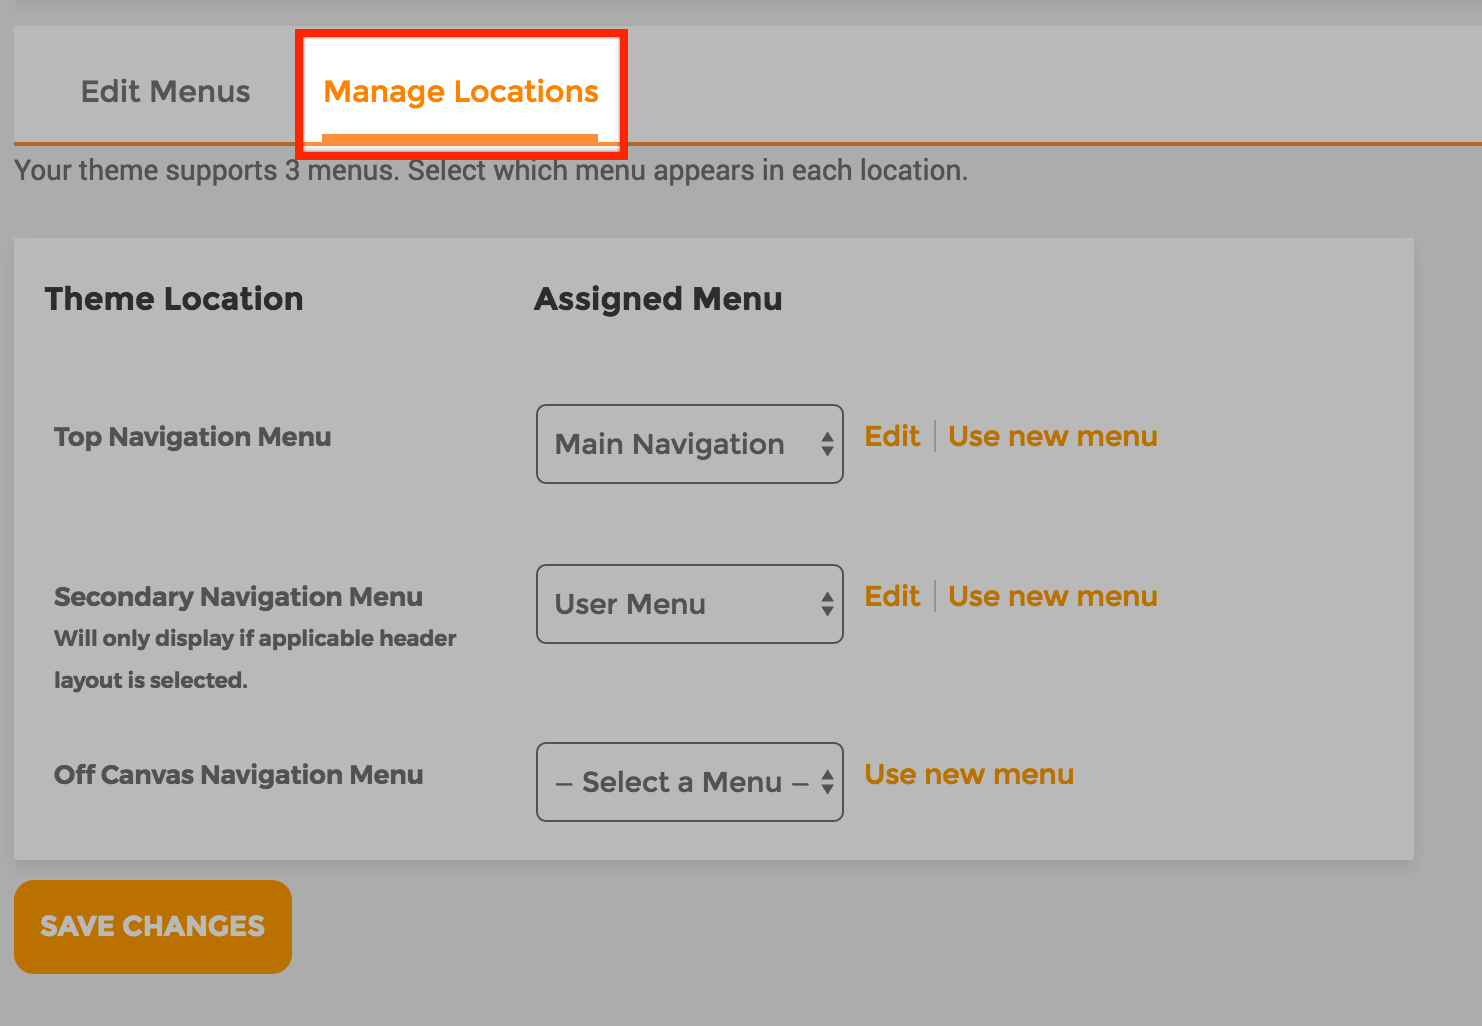
2) Edit which menu appears in each location
- Top Navigation - Main Site Navigation or the site's header bar
- Secondary Navigation - The site's secondary navigation. This is enabled/disabled in the theme options. Usually above or below the main navigation
- Off-Canvas Navigation - The site's slide out menu. This is enabled/disabled in the theme options and can be accessed by clicking the hamburger icon in the site's header bar

Related Articles
Add An Event
In the admin menu click on Events > Add Event. 1. Date And Time A. Set a start date and end date time of event: You can set start and end date time in there. B. All day event: If Check this feature, it means your event start at 0:00 AM and ending ...Add An Email User
Once the DNS settings have been properly configured, your email service is ready to be used. Now, you need to create email accounts for users on your Domain. You can either add one user account at a time, or multiple accounts at once. Add a new Email ...Add A Mailing List
What is a mailing list? A mailing list is a group of email addresses that can be used to send the same messages to multiple recipients. The entire group of recipients is represented by one mailing list address, such that when a mail is sent to this ...Add An Email Signature
Add a Featured Image
To set a featured image for your page, enter Page Builder and select "Set Featured Image" From the image selector, you can upload a new image or select a previously uploaded image from your media library. The featured image will appear once selected.