Sermon Box Email can be configured on various email clients such as Outlook, Outlook Express, Thunderbird, Windows Mail, Windows Live Mail, Apple Mail etc.,
The mail clients listed below contain instructions on how to setup your mail account for the mail clients specified.
- Microsoft Outlook 2013
- Outlook Express
- Apple Mail 3.6 (Leopard)
- Apple Mail 4.0
- Apple Mail 8.0 onwards
Setting up Email Account on Microsoft Outlook 2013
- When you first open Outlook, it will provide a “Welcome to Outlook 2013” message, click the Next button.
The next screen will ask “Do you want to set up Outlook to connect to an email account?” choose Yes and click the
Next button
On the Auto Account Setup menu, select the option for Manual setup or additional server types, then
click next

On the Choose Service menu, click the POP or IMAP option then click the Next button.
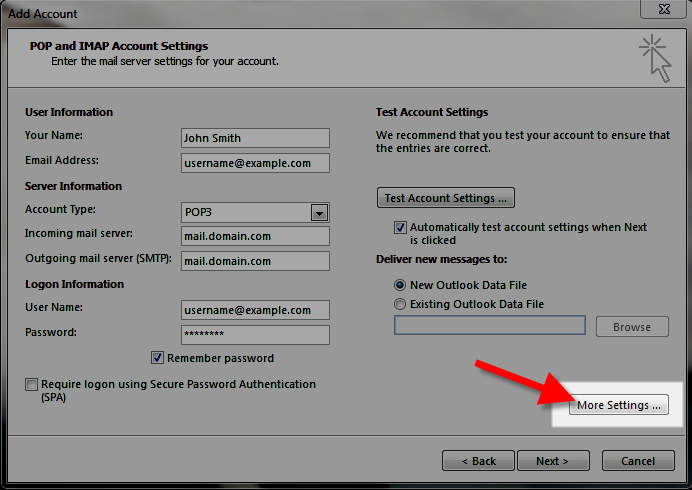
You will then see the POP and IMAP Account Settings menu, fill in the fields.
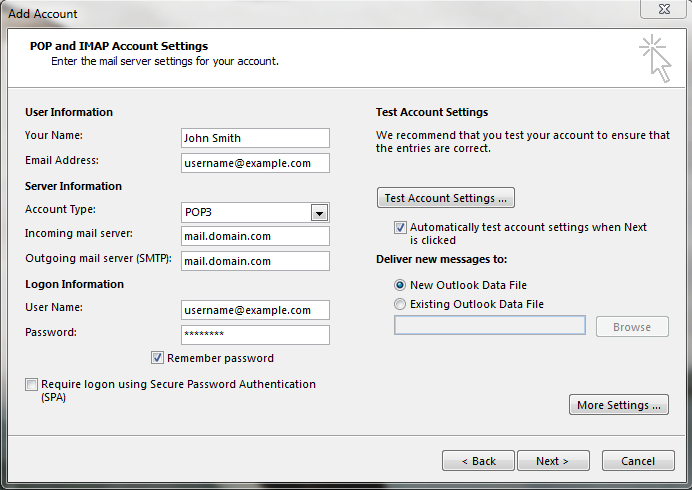
Click the More Settings button.
Click the Outgoing Server tab.
Check “My outgoing server (SMTP) requires authentication“.
Check “Use same settings as my incoming mail server“.

Click the Advanced tab
Enter your settings, below is a description of the available options.
Click the OK button.
Click the Next button, Outlook will test the account settings.
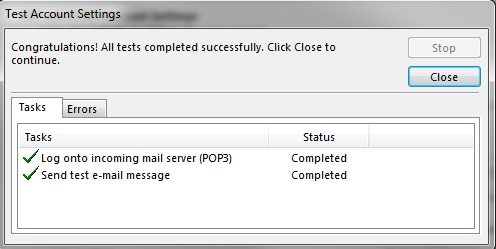
- You will see two tasks: Log onto incoming mail server, and, Send test e-mail message. When they are complete, Close button.
- You will see a message stating “You’re all set!” click the Finish button.
Setting up Email Account on Microsoft Outlook Express
Follow the steps detailed below to use Microsoft Outlook Express 6.0 to send/receive emails from your Email account.
- Start Outlook Express 6.0. On the Tools menu, click Accounts…
- In the Internet Accounts dialog box, click Add, and then click Mail…
- In the Display name box, type the name that you would like others to see when you send a message and then click Next.
- In the E-mail address box, type the email address for the account that you are using (for example, user@somedomainname.com) and then click Next.
Under E-mail Server Names, click the appropriate incoming e-mail server type POP3/IMAP (Post Office Protocol version 3 [POP3] is the default type)
Incoming & Outgoing mail server: Incoming & Outgoing mail server: You can obtain this information from your Email Dashboard. In Dashboard go to Mail > DNS Configuration and POP/IMAP/SMTP records. Or if you are using our DNS service for your domain then you can use: Incoming Mail Server: pop.your-domain-name (eg: pop.demomonkey.org)
Outgoing Mail Server: smtp.your-domain-name (eg: smtp.demomonkey.org)***For IMAP configuration,
Account Type: IMAP
Incoming Mail Server: imap.your-domain-name (eg: imap.demomonkey.org)
Outgoing Mail Server: smtp.your-domain-name (eg: smtp.demomonkey.org)
- Now, type your complete email address and password in the respective fields and click Next.
- The following window will display the success message – Congratulations, you have successfully entered all of the information required to set up your account. To save these settings, click Finish.
- Open the Internet Accounts dialog box referring to steps 1 and 2. In the Mail view, you will see the Account you have just added. Now you need to click Properties.
- Under the Servers tab, you need to check the checkbox My server requires authentication placed under Outgoing Mail Server. Once this is done, click Apply.
IMPORTANT
Usually, the port used for the Outgoing Mail Server/SMTP Service is 25. However, there might be a situation where your ISP might be blocking the use of port 25 for SMTP service. Many ISPs block port 25 in order to minimize the amount of spam sent using their network. If you are facing issues sending emails
using the default port 25, you can confirm with your ISP whether port 25 is indeed blocked by them.
To circumvent this, you can use an alternate port 587 for sending emails.
if port 25 is blocked. Here’s how:
a) In Outlook Express, on the Tools menu, click Accounts
b) Select the email account you wish to modify and click Properties
c) Under the Advanced tab, replace the default port number 25 with the alternate port number 587 in the field provided for Outgoing mail (SMTP)
d) Click OK and then Close to save the changesANNOUNCEMENT
SSL/TLS option has been enabled on our servers. The SSL/TLS option will run on the default ports. That
means,
you do not need to change the port numbers for the SSL/TLS option to work.
Steps to configure TLS/SSL in Outlook Express
a) Go to Outlook Express -> Tools -> Account
b) Click on Mail tab -> highlight your email account -> Properties
c) Click on “
Advance
” tab, Server Port No. for Outgoing Mail SMTP change to 25/587
d) Server Port No. for Incoming Mail POP3 is 995 and IMAP at 993
e) Check both the “This server require a secure connection (SSL)”
f) Click OK and Close the “Account” Window.
Your setup is complete. When you click on the Send/Receive button, your email will be downloaded by Outlook Express.
Setting up Email Account on Apple Mail (version 4.0):
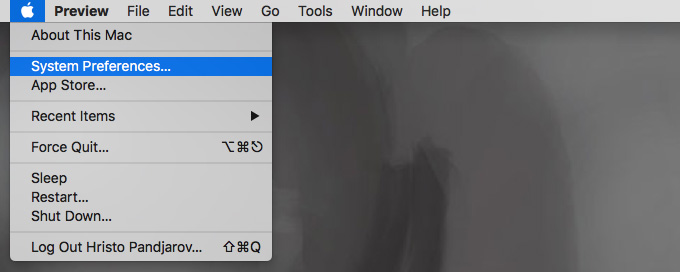
1. To begin with, click on the Apple Icon Menu on the top left of your screen and select the System Preferences… submenu.
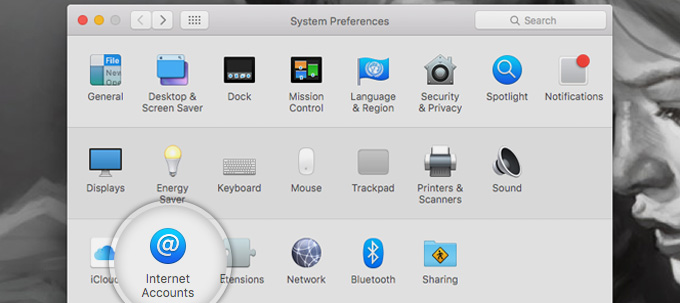
2. You will be taken to your System Preferences screen where you can adjust various options of your Mac OS. Select the Internet Accounts link to proceed.
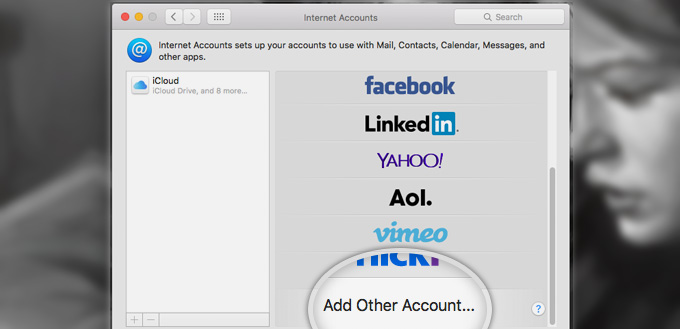
3. Here, you will see a list of all the different accounts you have registered including iCloud, FaceBook, Vimeo, etc. Scroll down and select the Add Other Account… option.
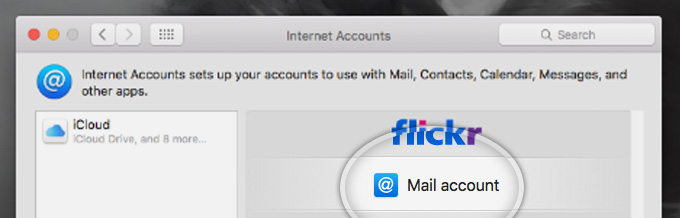
4. Next, select to add a Mail account on the next screen.
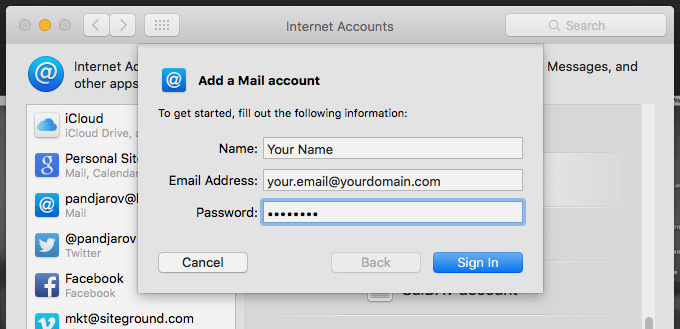
5. A popup will appear asking you to fill in your name and the Email address that you want to register with Mac Mail. Note, that people you send emails too will receive them from the name you enter here. This option, however, can be changed later on. Finally, click Sign in to proceed.
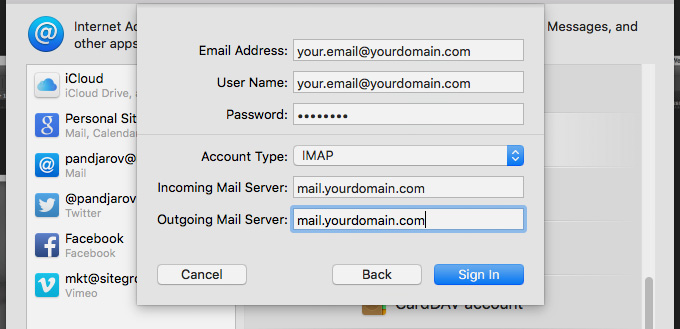
6. Now, you have to fill in the server settings for your Email account:
- Email Address: – should be pre-filled with the value you’ve entered in the previous screen;
- Username: – enter your full email address as username. It will be used both for the incoming and outgoing connection;
- Password: – enter the password for your email account;
- Account Type: – it’s set to IMAP by default. Unless you specifically want to use POP3, please leave it that way;
- Incoming Mail Server: – add mail.yourdomain.com unless you have a specific MX records configuration for your domain name;
- Incoming Mail Server: – same as the incoming server;
Once you fill in all the details, press Sign In to proceed.
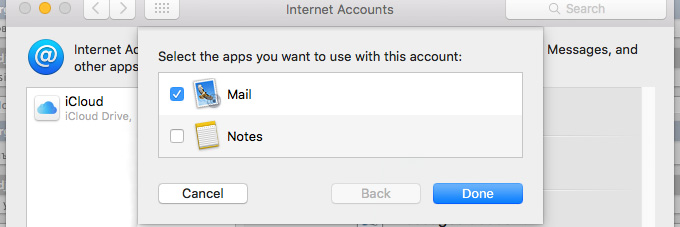
7. Finally, you will be asked which programs you want to use this account with. The available options depend on the applications you have installed on your account.
Setting up Email Account on Apple Mail (version 8 +):
Before You Begin
Before you set up email, make sure you have both the incoming (POP and IMAP) and outgoing (SMTP) server settings for your email provider. The settings are available from your email service provider.
Add Email Account
There are two paths to setting up email accounts in the Mac OS:
• Set up the Mail application for the first time.
• Add additional email accounts.
When you get to the Incoming Mail Server step, the directions are the same from that point forward.
Add First Account
The directions in this section are for setting up an email account for the first time. Follow these steps to set up a new email account.
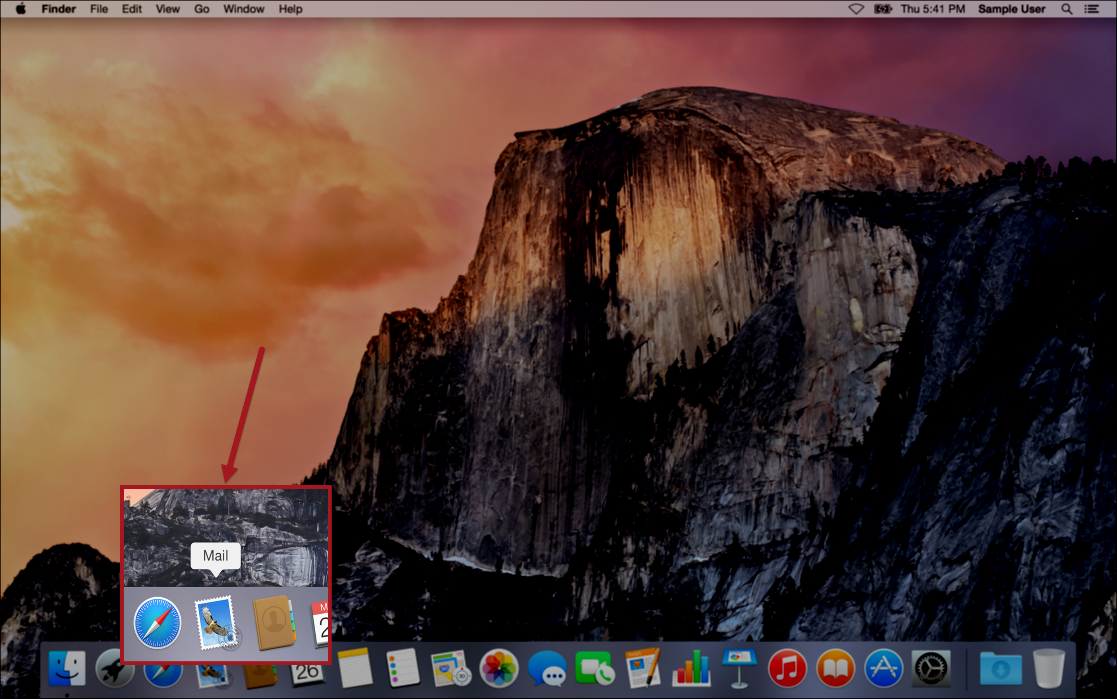
3. From the main Mac screen, hover over the dock to display the application icons.
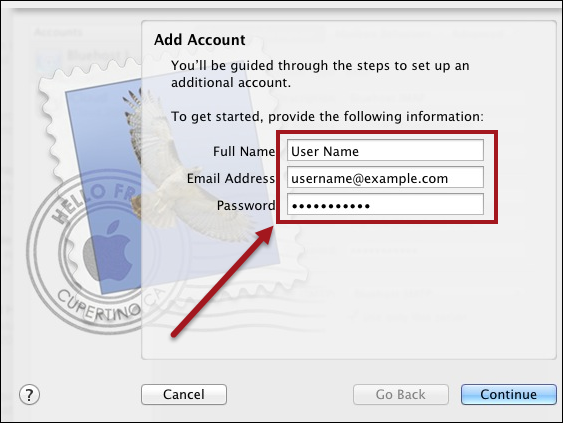
4. Click the Mail icon. The Add Account dialog box appears.
5. In the Add Account dialog box, type the appropriate information in the corresponding fields. The
fields include:
• Full Name.
• Email Address.
• Password.
Add Additional Account
If you have already added one email account, the directions in this section are for adding more email accounts. Follow these directions to add additional email accounts.
1. From the main Mac screen, hover over the dock to display the application icons.
2. Click the Mail icon. The mail application appears.
3. From the menu bar, click Mail > Preferences. The Accounts dialog box appears.
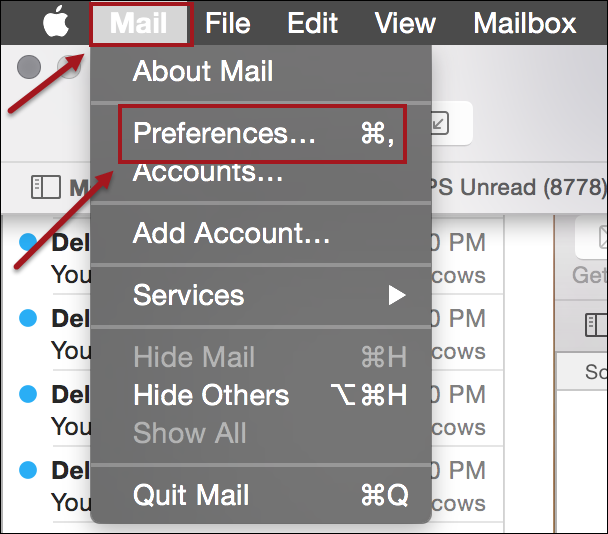
4. On the Accounts dialog box, click the plus sign.
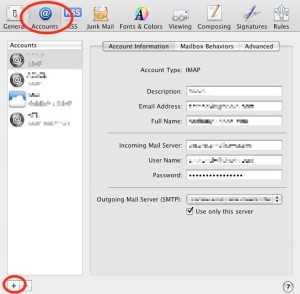
The Choose a mail account to add dialog box appears.
Add Account Information
Whether it’s the first time or you are adding a second or third account, the directions are the same from this point forward.
1. On the Choose a mail account to add dialog box, click the Add Other Mail Account radio button.
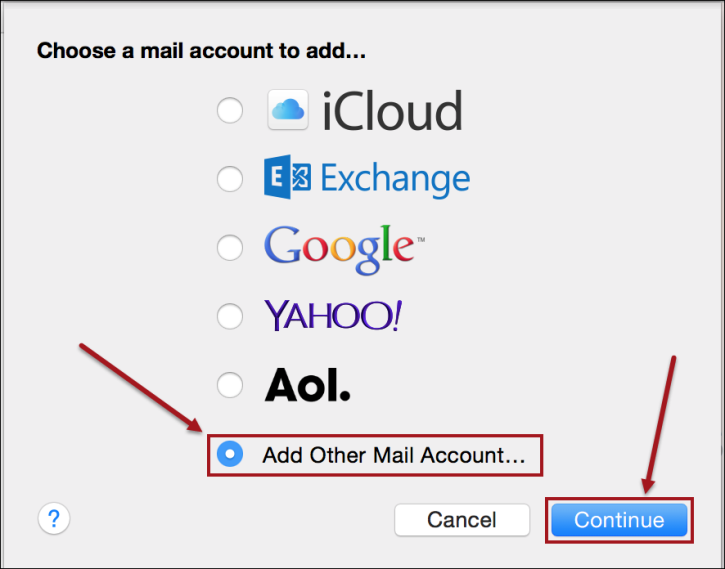
2. Click Continue. The Add a Mail Account dialog box appears. The Full Name field is with your full name.
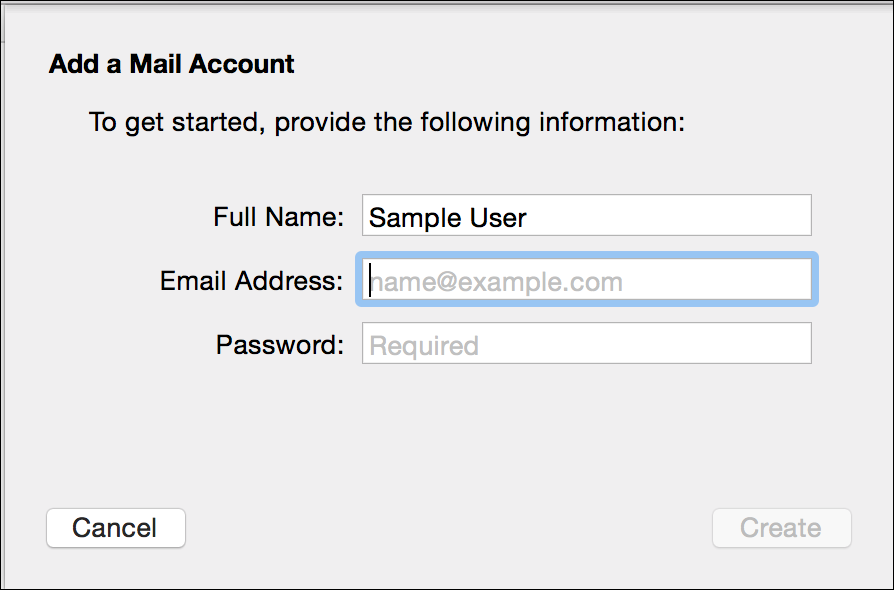
3. In the Add a Mail Account dialog box, in the Email Address and Password fields, type the corresponding information.
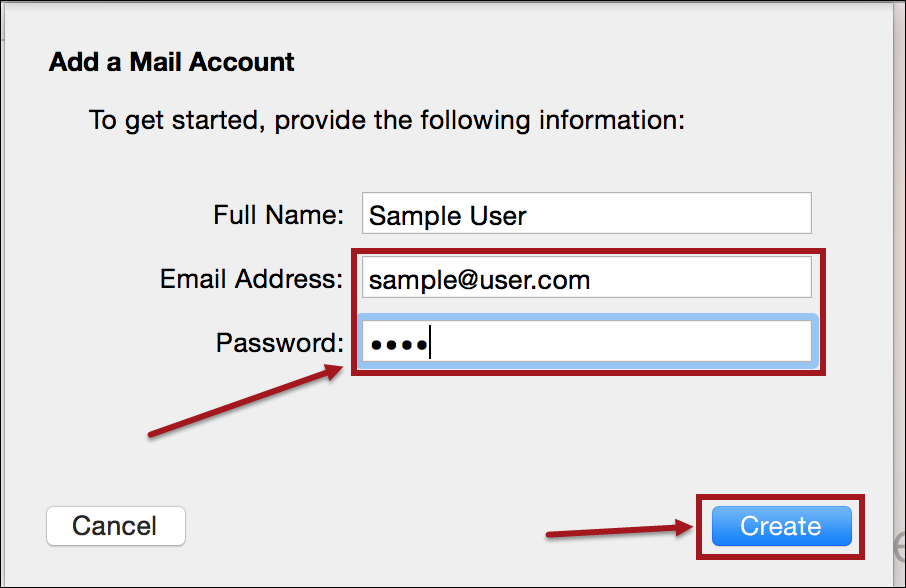
4. Click Create. The Incoming Mail Server Info screen appears.
Setup IMAP
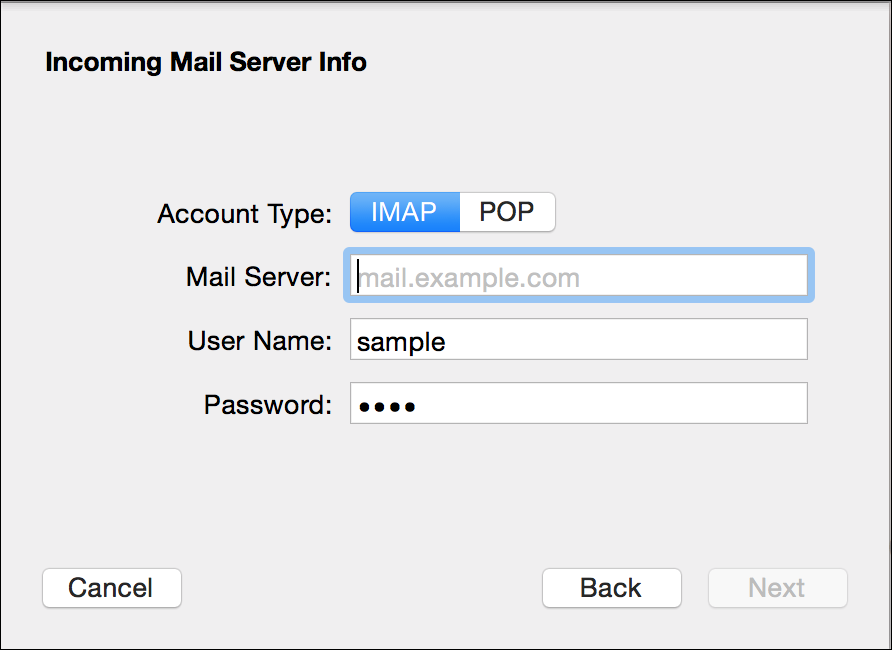
When the Incoming Mail Server Info dialog box appears, the IMAP fields appear by default. Follow these directions to set up IMAP.
1. In the Incoming Mail Server dialog box Mail Server, User Name, and Password fields, then type the corresponding information.
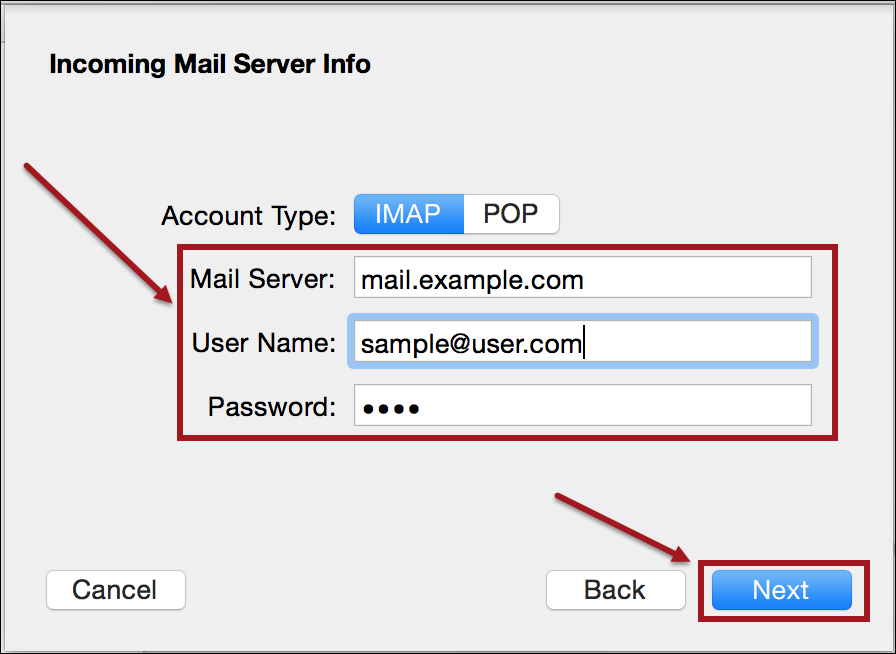
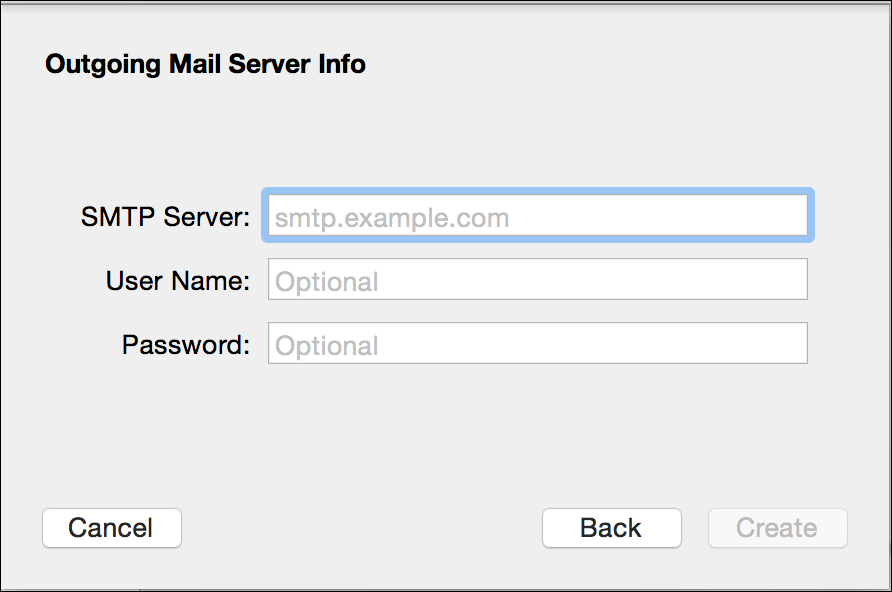
2. Click Next. The Outgoing Mail Server Info dialog box appears.
3. In the Outgoing Mail Server Info dialog box SMTP Server, User Name, and Password
fields,
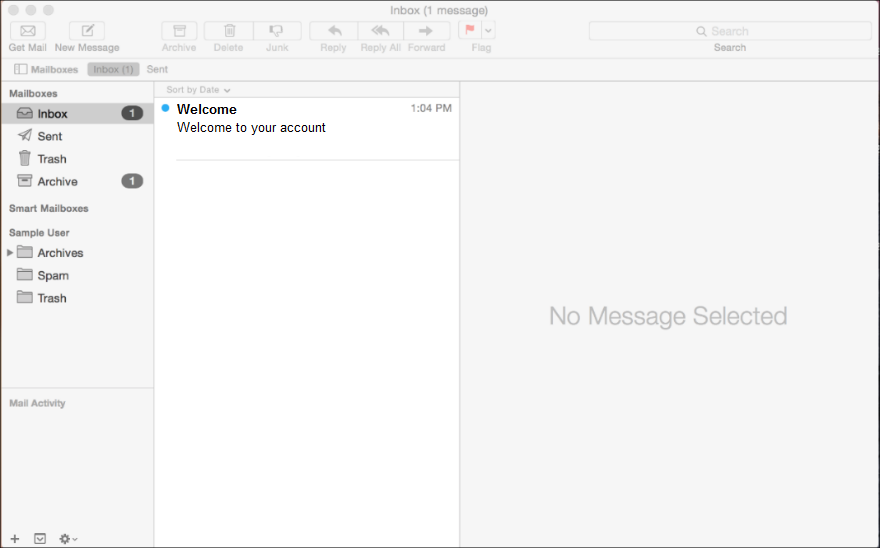
type the corresponding information.
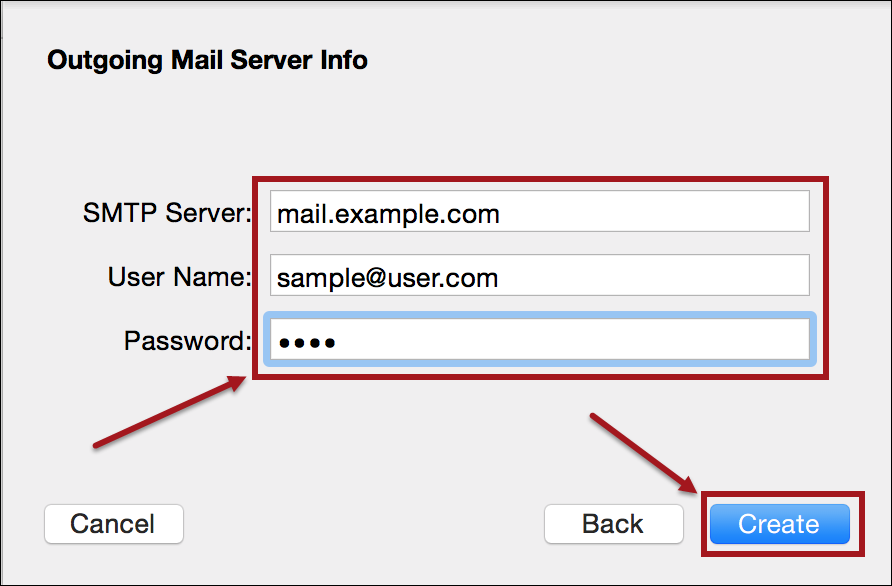
4. Click Create. The Inbox appears and the new email account is created.